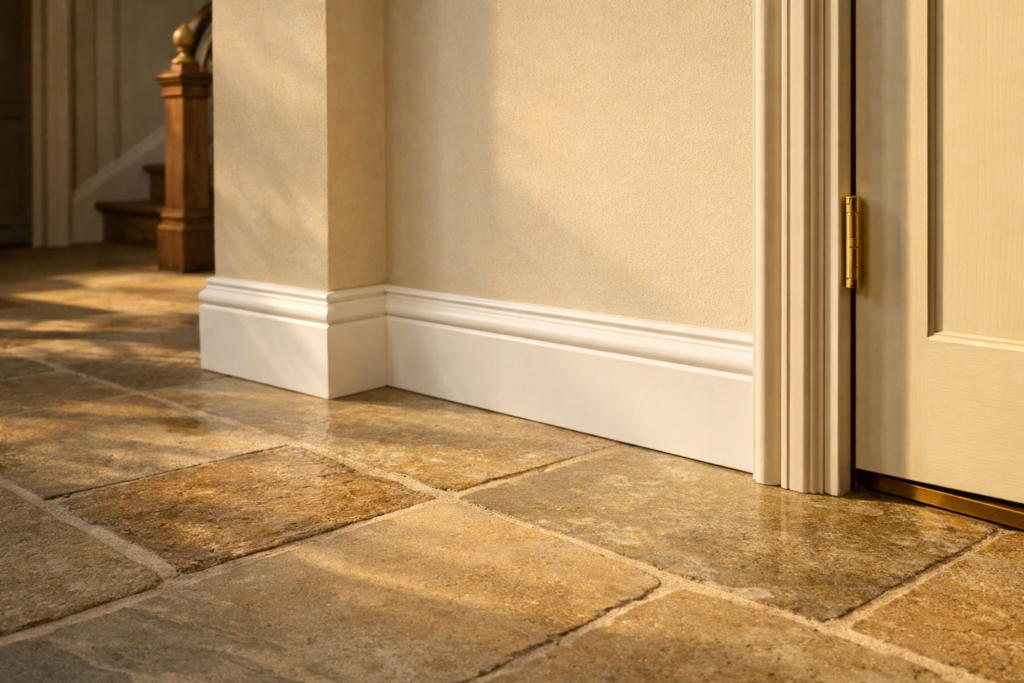
If you want to install baseboards, the job is very manageable with careful measuring, accurate cuts, and patient fitting. In simple terms, you measure each wall, cut straight runs and corner joints, fix the trim to the wall, then caulk, fill, and paint or finish it for a clean result.
Baseboards, also called skirting boards in some regions, cover the expansion gap where flooring meets the wall and protect the lower wall from scuffs. They also make a room look complete. The details matter, though: uneven floors, out-of-square corners, and wavy walls can all affect the fit. A steady, methodical approach will give you the best result.
What you need to install baseboards
The exact tools and materials depend on the style of trim and the wall construction, but most jobs use the following:
Tools
- Tape measure
- Pencil
- Miter saw or miter box and fine-tooth saw
- Coping saw for inside corners
- Utility knife
- Level or straightedge
- Stud finder if available
- Hammer and nail set, or a finish nailer
- Caulking gun
- Putty knife
- Sandpaper or sanding sponge
Materials
- Baseboard trim
- Finish nails or trim screws suitable for your wall type
- Construction adhesive if needed for difficult walls
- Wood filler or decorator’s filler
- Paintable caulk
- Primer and paint, or stain and clear finish depending on the trim
If you are working on masonry, plaster, or other harder wall surfaces, the fastening method may differ. Check local product guidance and wall type before fixing anything.
Before you start
Let the trim acclimate
Store the baseboards in the room for at least a day if possible. Wood and fiberboard can move slightly with changes in temperature and humidity, so letting the material settle can reduce later gaps.
Check the floor and walls
Look for dips in the floor, bulges in the wall, and corners that are not exactly 90 degrees. These are normal in many homes. Spotting them early helps you decide where to start and where you may need scribing, caulk, or a slightly adjusted cut.
Plan your joints
Try to place scarf joints, where two pieces meet along a long wall, in less noticeable areas. Use full lengths where possible. Also think about where the most visible corners are. A neat joint near a doorway matters more than one hidden behind furniture.
Safety first
Wear eye protection when cutting or nailing. Use hearing protection with power saws and nailers. Keep hands well clear of blades. If you think cables or pipes may run low in a wall, check carefully before nailing, especially in renovated spaces. Follow local safety guidance for power tools and dust control.
How to measure and plan the layout
Good baseboard work starts before the first cut.
- Measure each wall separately. Do not assume opposite walls are equal.
- Mark inside and outside corners. Label your measurements so you know which end needs which cut.
- Identify studs if the wall is stud construction. Light pencil marks a little above the future trim line can help later.
- Decide your installation direction. Many people work around the room in one direction, fitting inside corners as they go.
- Dry-fit tricky walls first. Short return pieces, outside corners, and areas around door casings are worth checking before final fixing.
If your floor is not yet installed, do not fit the baseboards until you know the finished floor height and expansion requirements. Different flooring products need different gaps, so check the manufacturer’s instructions.
How to cut baseboards for clean joints
Square cuts for straight ends
For a baseboard ending at a door casing or a straight butt joint, a clean 90-degree cut is often all you need. Measure from the correct face of the board and cut with the finished side supported to reduce tear-out.
Inside corners: cope or miter?
Inside corners can be joined in two common ways:
- Mitered inside corner: both pieces are cut to meet at an angle, usually 45 degrees each.
- Coped inside corner: one piece runs square into the corner, and the profile of the joining piece is cut to fit over it.
Coped joints usually hide minor corner irregularities better and are often the more durable choice for painted trim. To make one, cut a 45-degree inside miter on the second piece, then follow the exposed profile line with a coping saw. Trim away the waste behind the face so the front edge fits tightly.
Outside corners
Outside corners are typically made with two matching miters. Start with 45 degrees as a guide, but do not assume the corner is perfect. Test-fit and adjust slightly if the point opens or the back edges do not meet.
Scarf joints on long runs
If one wall is longer than your trim pieces, join two lengths with matching angled cuts rather than a square butt joint. This is called a scarf joint. The angled overlap is less noticeable and usually holds up better visually as the material moves.
How to install baseboards step by step
- Cut and dry-fit the first piece. Start with a straightforward wall if possible. Fit one end tightly, then check the other end before fastening.
- Position the baseboard. Set it flat against the wall and tight to the floor. If the floor has a slight dip, choose whether to keep the top edge level or follow the floor. In most rooms, following the floor gives the cleanest look at the bottom edge.
- Fasten into studs or solid backing. Use finish nails spaced at regular intervals, commonly every 400–600 mm (16–24 in), with extra fixings near ends and joints. Avoid nailing so close to the edge that the trim splits.
- Add adhesive only if needed. A small amount can help on uneven walls, but do not rely on adhesive alone unless the product is specifically suitable for the wall and trim. Some adhesives can make future removal difficult.
- Fit inside corners carefully. Install the square-cut piece first, then fit the coped or mitered piece against it. Make small adjustments with a file or utility knife if needed.
- Assemble outside corners with care. Dry-fit both pieces before nailing. It often helps to pin one side lightly, bring the second side in, then adjust the corner before fully fastening.
- Install scarf joints over solid backing if possible. This reduces movement and helps keep the joint flush.
- Check alignment as you go. Step back often. A gap that looks small up close can become obvious from across the room.
If you are using a nailer, test the air pressure or depth setting first on an offcut. Overdriven nails can damage the trim surface, while underdriven nails are harder to finish neatly.
Dealing with uneven walls and floors
Very few rooms are perfectly straight. These simple fixes help.
Small wall gaps
If the top edge of the baseboard pulls away from the wall slightly, fastening into studs may close the gap. If a small gap remains, paintable caulk usually finishes it neatly on painted trim.
Uneven floors
If the floor drops away in spots, pressing the baseboard tightly down can create a wavy top line. In some cases, it is better to keep the top line visually consistent and fill a very small bottom gap later. For a higher-end finish, you can scribe the bottom edge to the floor and trim it to match the floor’s shape.
Out-of-square corners
If a 45-degree cut does not close properly, adjust the angle a degree or two and test again. Sneak up on the fit rather than removing too much at once.
Finishing the baseboards
The finishing stage is what makes the work look professional.
- Set and fill nail holes. If needed, use a nail set to sink nails slightly below the surface. Fill the holes with wood filler or decorator’s filler.
- Caulk the top edge and corner gaps. Use a thin bead of paintable caulk where the trim meets the wall and at small joint lines. Smooth it immediately for a clean finish.
- Sand lightly. Once filler is dry, sand the repaired spots smooth. Do not oversand profiled edges.
- Prime bare material if required. This is especially important on raw wood or repaired areas.
- Paint or finish. Apply your chosen finish in thin, even coats. If staining natural wood, avoid caulk on visible face joints unless the product is compatible with the finish.
Pre-painting or pre-finishing trim before installation can save time, especially with stained wood. Even so, expect to do some touch-up after fitting and filling.
Common mistakes to avoid
- Measuring only once. Always double-check before cutting.
- Assuming corners are perfect. Test-fit every miter.
- Skipping dry fits. A few extra minutes here can save a lot of filling later.
- Nailing into weak spots. Fixings hold best in studs or solid backing.
- Using too much caulk. Caulk should hide small gaps, not replace a poor fit.
- Forgetting expansion details. Flooring often needs movement gaps, and the baseboard is there to cover them, not compress the floor.
Should you remove old baseboards first?
Usually, yes. If you are replacing trim, remove the old baseboards carefully to avoid damaging plaster or drywall. Score any paint line at the top edge with a utility knife first, then gently pry the trim away using a wide putty knife or thin board to protect the wall surface.
In some renovations, people add a new, taller baseboard over the area after removing the old one. Others use a small base shoe or quarter-round molding at the bottom instead of replacing the full trim. The best choice depends on the existing trim, floor level, and the look you want.
Frequently asked questions
Do I need to cope inside corners?
No, but coping often gives a tighter, longer-lasting inside corner on painted trim, especially in rooms where the corners are not perfectly square.
Is it better to paint baseboards before or after installation?
Either can work. Pre-painting is faster and cleaner, but you will still need touch-ups after filling holes and caulking joints. Many people prime or apply one coat first, then finish after installation.
What size nails should I use?
It depends on the trim thickness and wall construction. The nail should pass through the trim and bite securely into solid backing without causing splitting. Follow the trim and fastener guidance for your wall type.
How do I hide gaps at the top of the baseboard?
First, improve the fit with better fastening. For small remaining gaps on painted trim, use a fine bead of paintable caulk. For larger gaps, check whether the wall is bowed or the trim is twisted before relying on filler.
Can I install baseboards over carpet?
Yes, but the fit can be trickier. It is usually easiest when the trim is planned alongside the flooring. If the carpet is already in place, take care not to trap it awkwardly or damage it while cutting and fixing.
Conclusion
To install baseboards well, focus on three things: accurate measuring, careful corner joints, and tidy finishing. Work slowly, dry-fit often, and make small adjustments instead of forcing pieces into place. Even in an older room with uneven walls or floors, a patient approach can produce clean, durable trim that makes the whole space look sharper.


