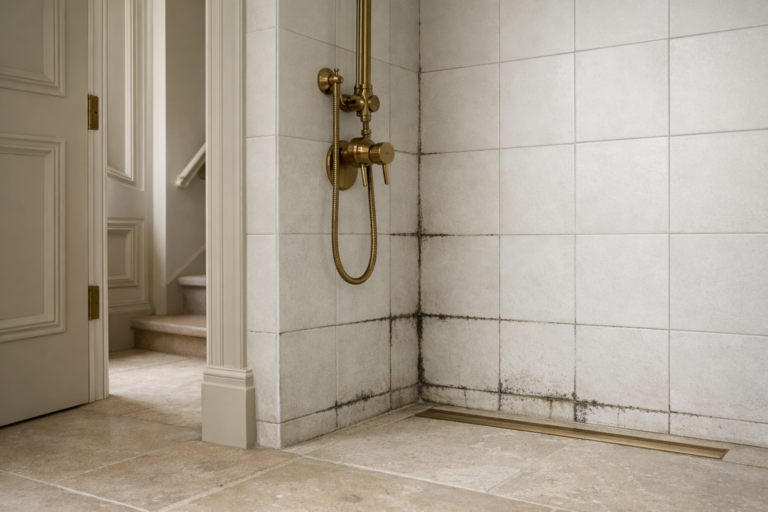
To clean shower head buildup, you usually need nothing more than a mild acidic soak, a soft brush, and a little patience. In many cases, a shower head that sprays unevenly or has weak pressure can be improved by dissolving mineral deposits and clearing blocked nozzles.
Over time, water leaves behind limescale and other minerals, especially in hard-water areas. Soap residue can also collect on the face of the shower head. The result is patchy spray, reduced flow, and a less comfortable shower. The good news is that most shower heads are easy to clean at home without special tools.
Why shower heads get clogged
Most shower heads clog because dissolved minerals in water dry on the spray plate and inside the small channels. The exact deposits vary by region, but limescale is a common cause. If your water supply is hard, buildup can happen faster.
Other common causes include:
- Soap residue that sticks to the outer face
- Mold or mildew in damp bathroom conditions
- Rust particles or sediment from older pipework
- Debris in the filter screen where the shower head connects to the hose or pipe
If your shower head has suddenly lost pressure throughout the home, the problem may not be the fixture itself. It could be a water supply issue, a valve problem, or a heater-related restriction. If cleaning does not help, further checks may be needed.
What you need to clean shower head buildup
You do not need a large kit. Gather a few simple items first:
- White vinegar or a limescale remover suitable for bathroom fixtures
- Warm water
- A bowl, container, or plastic bag
- A soft toothbrush or small cleaning brush
- A microfiber cloth or soft rag
- A rubber band, string, or twist tie if soaking it in place
- An old toothpick or wooden skewer for stubborn nozzle blockage
For removable shower heads, a bowl works best. For fixed shower heads, a bag tied around the head can hold the soaking liquid in place.
Safety note: Always check the finish and manufacturer care guidance if you have it. Some decorative coatings can be damaged by strong cleaners or long acidic soaks. Never mix cleaning chemicals, especially acidic products with bleach or chlorine-based cleaners.
How to clean shower head step by step
There are two main methods: cleaning the shower head while it is still attached, or removing it for a deeper clean. If you can remove it easily, that usually gives the best result.
Method 1: Clean a fixed shower head without removing it
- Wipe the surface first. Use a damp cloth to remove soap residue and loose dirt from the outside.
- Prepare the soak. Fill a sturdy plastic bag partway with white vinegar, or a mix of vinegar and warm water if you want a gentler soak.
- Secure the bag around the shower head. Make sure the spray face is fully submerged. Tie the bag in place with a rubber band or string.
- Leave it to soak. For light buildup, 30 minutes may be enough. For heavier limescale, leave it longer, but avoid excessive soaking if you are unsure about the finish.
- Remove the bag and scrub gently. Use a soft toothbrush to clean around the nozzles and faceplate.
- Clear blocked nozzles. Gently loosen any remaining deposits with a wooden skewer or toothpick. Avoid metal pins that may scratch the surface or damage rubber nozzles.
- Run hot water through the shower head. Turn on the shower for a minute or two to flush out loosened debris.
- Polish dry. Wipe the outside with a soft cloth to reduce water spots.
Method 2: Remove the shower head for a deeper clean
- Turn off the shower. If possible, make sure the control is fully off before you begin.
- Protect the finish. Wrap a soft cloth around the connecting nut if you need to use pliers or an adjustable wrench. This helps prevent scratches.
- Unscrew the shower head. Turn it carefully counterclockwise. Some models unscrew by hand; others need light tool pressure.
- Check the washer and filter screen. Look inside the connection point. Remove any visible debris carefully.
- Soak the shower head. Place it in a bowl of white vinegar or a suitable descaling solution. If only the spray face is clogged, partial soaking may be enough.
- Brush inside and out. After soaking, use a soft brush on the nozzles, threads, and faceplate.
- Rinse thoroughly. Flush under clean water to remove loosened scale and cleaner residue.
- Reassemble. Refit the washer or filter if removed, then screw the shower head back on. Hand-tighten first, then gently tighten more if needed.
- Test for flow and leaks. Run the shower and check the spray pattern and connection point.
Tip: If the connection leaks after reassembly, the washer may be worn, misplaced, or the threads may need sealing tape, depending on the design. Check the fitting type and local plumbing guidance before adding any sealant.
How long should you soak a shower head?
The right soaking time depends on how much buildup there is and what material the shower head is made from. Light deposits often soften within 30 to 60 minutes. Heavier limescale may need a longer soak.
However, longer is not always better. Strong acids and extended soaking can dull some finishes or affect seals over time. If your shower head has a specialty finish such as matte black, brushed metal, brass-tone, or painted coating, use extra care and test a small area first if possible.
If you are using a commercial descaler, follow the product directions exactly. Formulas vary, and some are stronger than vinegar.
What to do if vinegar does not work
If a basic soak does not fully clean the shower head, there are a few likely reasons. The buildup may be heavy, the blockage may be inside the filter screen, or the issue may not be scale at all.
Try these next steps
- Repeat the cleaning process and brush more thoroughly around each nozzle
- Remove and clean the filter screen if your model has one
- Use a bathroom descaler that is compatible with your shower head finish
- Flush the pipe or hose briefly before refitting the head to clear loose sediment
- Inspect for damage such as cracked internal parts or perished rubber components
If the spray pattern is still poor after thorough cleaning, the shower head may be worn out. In that case, replacement may be more practical than repeated descaling.
How to keep a shower head clean for longer
Regular light cleaning is easier than dealing with heavy scale later. A few simple habits can slow buildup and keep the spray even.
- Wipe the spray face weekly. A quick wipe removes fresh residue before it hardens.
- Rub flexible nozzles gently. Many modern shower heads have rubber tips designed to release scale with light finger pressure or a soft cloth.
- Dry the surface after use. This can reduce water spots and mineral deposits, especially in hard-water areas.
- Deep-clean every 1 to 3 months. The exact interval depends on your water quality and how often the shower is used.
- Consider water treatment. In some homes, a water softener or filter may reduce mineral buildup. Suitability varies by region and plumbing setup.
Mistakes to avoid when you clean shower head parts
A careful approach matters. Some common cleaning mistakes can damage the fixture or make performance worse.
- Using abrasive pads that scratch chrome, coatings, or plastic surfaces
- Using metal needles that widen or tear soft nozzle openings
- Mixing chemicals such as bleach and acidic cleaners
- Overtightening the fitting when reinstalling the shower head
- Ignoring the filter screen when clogs keep returning
- Leaving acidic cleaner on too long on delicate finishes
If your shower head is connected to an electric shower unit or other integrated system, avoid interfering with electrical components. Clean only the removable or exposed water outlet parts, and follow the appliance instructions. If in doubt, consult a qualified professional.
When cleaning is not enough
Sometimes the shower head is only part of the problem. If you have cleaned it properly and the water flow is still weak, consider these possibilities:
- A kinked or blocked shower hose
- A partially closed valve
- A clogged faucet or mixer cartridge
- Sediment elsewhere in the plumbing
- Low water pressure affecting the whole property
- An issue with the water heater or shower pump, if fitted
If multiple fixtures have low flow, it is worth checking whether the issue is more general than the shower head. Plumbing systems differ from place to place, so if you suspect a supply or pressure problem, follow local guidance or contact a plumber.
Frequently asked questions
Can I use baking soda to clean a shower head?
Yes, but it works best as a gentle scrubbing paste rather than the main descaler. Mineral deposits usually respond better to a mild acid such as vinegar or a suitable limescale remover.
Is vinegar safe for all shower heads?
Not always. Vinegar is widely used, but some finishes and internal parts may not tolerate strong or extended exposure well. If you have the care instructions, check them first. When unsure, use a shorter soak and test carefully.
How often should I clean my shower head?
For many homes, every 1 to 3 months is enough for a deeper clean. If you have hard water, you may need to clean it more often and wipe it down weekly.
Why is only some of the spray working?
That usually means some nozzles are blocked by mineral deposits or debris. Cleaning the faceplate and flushing the inside often restores an even spray pattern.
Should I replace my shower head instead of cleaning it?
If cleaning no longer improves the flow, or if the head is cracked, corroded, or leaking internally, replacement may be the better option.
Conclusion
To clean shower head buildup effectively, start with the simplest method: soak, brush, flush, and rinse. In many cases, that is enough to restore a stronger, more even spray. Regular upkeep will help prevent limescale from returning, and if cleaning does not solve the issue, the problem may lie elsewhere in the shower system.